Enjoy, and remember ALWAYS work safe and I assume NO RESPONSIBILTY for your actions, mechanical abilities or
anything that may occur during the nature of any repair.
The Site Has Been Revamped With Added Features, Please Update Your Bookmarks Accordingly. I have now finalized writing all the redirects, so all the old pages will automatically redirect to the new pages.
Let me explain what I experienced.
I had a bit of a squeal, almost like belt chatter, so I sprayed some
belt conditioner on the belts but this did not cure the problem.
Then my
SES light came on and I read code P1159 and P1161. These codes are
actually for the O2 Sensors, but I pulled the dipstick and the air was
just rushing in and the idle changed a little. This is NOT normal, so
I started with the Rear Manifold Cover and will see what I get.
There is much talk
about how hard this is to get off, mainly because of 2 T-30 Torx bolts
on the bottom of the Rear Manifold Cover. I didn’t find it that hard
with the tools I selected. BMW actually recommends [per TIS] that you
pull the manifold for this $80 part that btw is prone to failure. I
find that ridiculous and don’t think it is required, unless you feel
you need new gaskets.
Parts: This is for a model
year ’99, please verify parts numbers for your application prior to
purchase.
11 14 1 460 752 – Torx Bolt
x1 [I bought just
one to test fit a quality torx socket AND to size up bolts because I
changed to a standard 10MM Hex head bolts]
Tools:
¼ inch Drive – 6 inch Flex T Handle
Torx T-30 Socket
10 mm Socket for the new hex bolts I
will put in to eliminate the PITA Torx.
¼ inch Ratchet Drive
Flashlight [see below]
Please Click On Any Picture Below To Enlarge That Picture.
Here are the tools
I used, I’ve number a few but I’m sure everyone knows what the rest
are:
1.) ¼ inch Drive – 6 inch Flex T Handle
2.) Torx T-30 Socket
3.) 10 mm Socket for the new hex bolts I
will put in to eliminate the PITA Torx.
4.) ¼ inch Ratchet Drive
5.) Flashlight [see below]
If you like to chew
on flashlights, have at it, but I love my headband light. It’s dark
in the back of the engine compartment and this worked great. Just
please don’t look in a mirror while wearing this thing……..dork
alert…:
Here’s a pic of the
Torx Socket, just look at those teeth! This should prevent and
stripping:
Let’s get started.
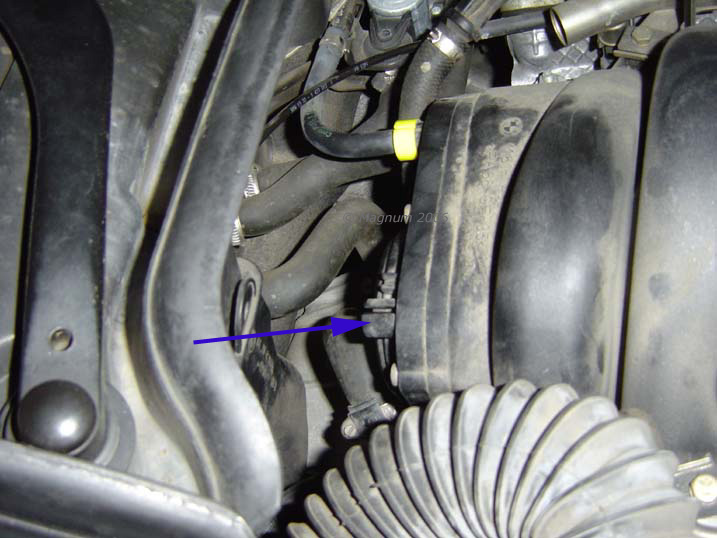
The blue lines and arrow show what I’m replacing. As you can see it
is buried back by the fire wall, so this is the best pic I could get:
Start by removing
these. Simply slide the yellow clips off and then pull off the hoses:
There’s one off,
now get the second:
Now let’s remove
the only hose that needs to be removed, you can’t get access to 2 of
the torx bolts unless you remove this. Very little coolant will spill
so don’t worry much about that:
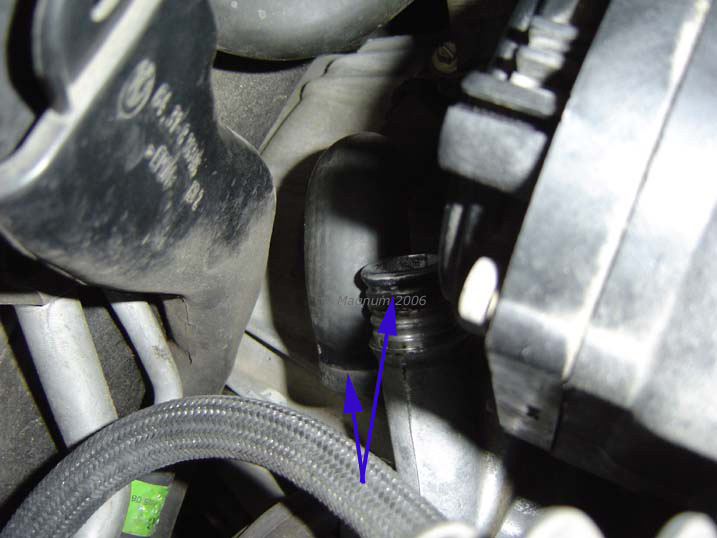
Now, slide this
off. I had best luck using a long flat head screwdriver to slide it
back and then lay it down. This is spring loaded and takes some time
and force to get it undone. It slides back like the pic dictates.
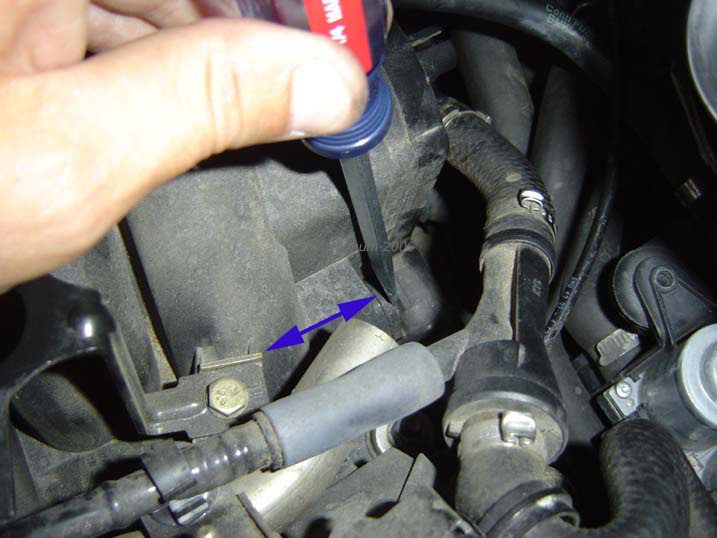
Then remove the brake booster line you see here, it’s the “Y” looking
thing. For this, just cut the clamp and pull it off the Rear Manifold
Cover.
***NOTE: If you have a '98
and below, you should have a "flap" that you pop up and then slide
this off.***
Now remove the 7
[seven] T-30 torx bolts that hold the Rear Manifold Cover on. This can be tricky, but I took my time and had NO issues at all
cracking them loose. I’d actually say it was fairly easy; I just made
sure the torx socket was fitted properly prior to loosening. No pics,
but you get it…..I hope….! Once the bolts are out SLOWLY pull off the Rear Manifold
Cover.
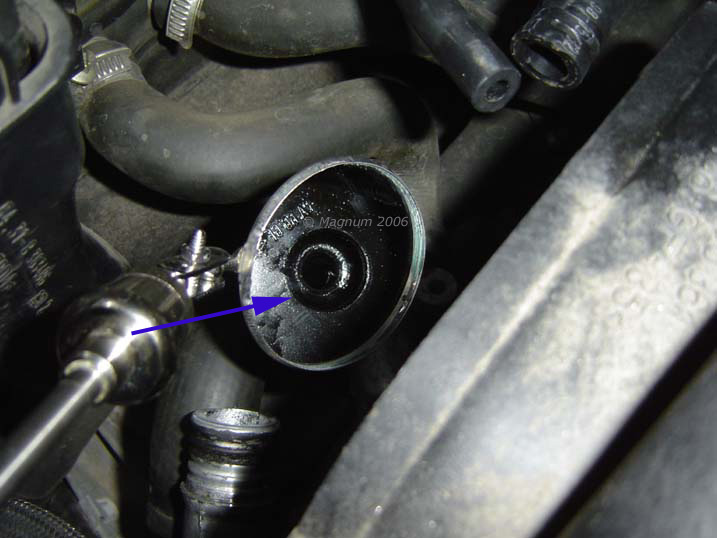
I’ve read something
about a metal tube that the Rear Manifold Cover hooks to and there is a possibility that you could pull it out IF you
chose to not remove the manifold, well I say not true on the ’99
plus. Here’s a pic, it looks to me like it is all enclosed. Now I’m
not saying tear it out and blah, blah, blah:
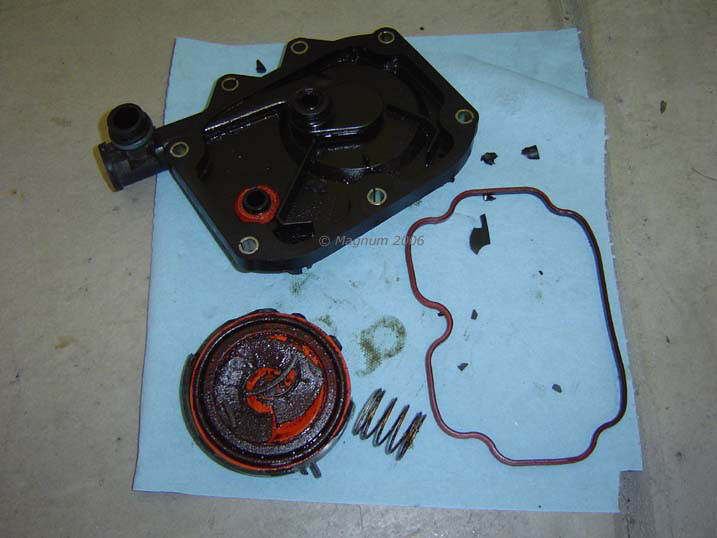
Here’s the old Rear Manifold
Cover I broke open:
Classic symptom:
Now, if you already
haven’t done it, using your mirror locate the old gasket back there
and pull it out. Then take your new gasket and put it in. The gasket
is perfectly shaped and fit in nicely, even though you can’t see shit.
Here’s the bolt and
washer I bought to re-install. You need 7 [seven] of them:
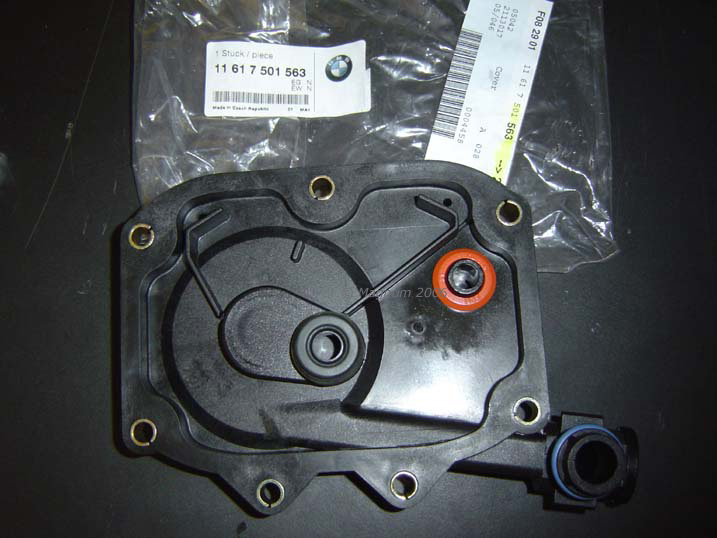
Here are a few pics
of the new Rear Manifold Cover. Oil
up the blue gasket so it’s slick and slides nicely when fitting the
spring loaded cover thing back over it:
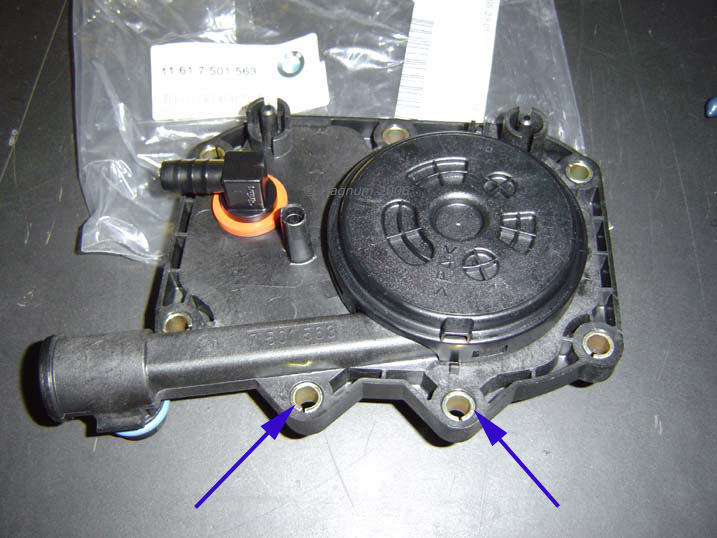
Another, the 2
arrows depict the hardest 2 torx bolts to get at:
And another:
I applied a light
coat of oil around the main gasket prior to fitting the Rear Manifold Cover in. Now put the Rear Manifold Cover on, and hand tighten all 7 [seven] 10mm hex bolts, then go around and
tighten them all down using the variation of the Flex Drive and
Ratchet . Now put the spring loaded thing back on, the brake booster
hose back on with a new clamp, put the heater core hose and clamp back
on and finally put the 2 top hoses and yellow clamps back on.
Here’s another pic
of the spring loaded clip. I don’t really know what it is, but don’t
forget to put it on:
To verify your Rear Manifold Cover
has failed, simply start the car and pull the dipstick while the
car is idling. If you here a feel a lot of suction and a
strong whoosh of air like this video clip, mare than likely your
Rear Manifold Cover is shot. This video clip was BEFORE I
replaced the Rear Manifold Cover:
Well there you have
it; I’ve replaced the Rear Manifold Cover without pulling the manifold, not stripping a single torx screw and
not breaking anything else.
After this
replacement I cleared the codes I had and upon the first start up I
noticed a huge plume of smoke, but that is normal and has not done it
since. I cleared the codes I had P1159 and P1161, drove the car and
all seemed good. I will see what happens tomorrow after another drive
cycle.
***Update:
All has need good with this for several thousand miles, so my
diagnosis was accurate.***
Disclaimer: Not for distribution, redistribution, sale, re-sale or
otherwise without my written consent. You do have consent to link back to any page on this site that may assist individuals. This information is presented
with no liability or guarantee expressed or implied, work at your
own risk.