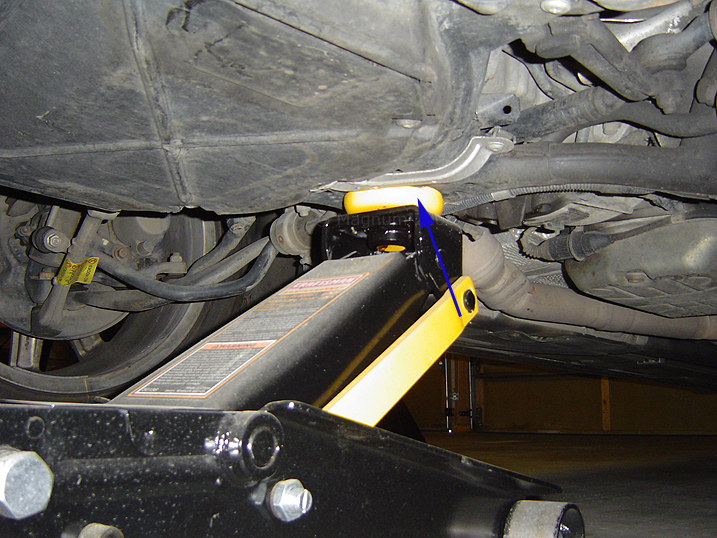
| First get the car up in the air, here’s the jack point I use to lift
the whole front end at once, there’s a little round puck on the cross
member: |
|
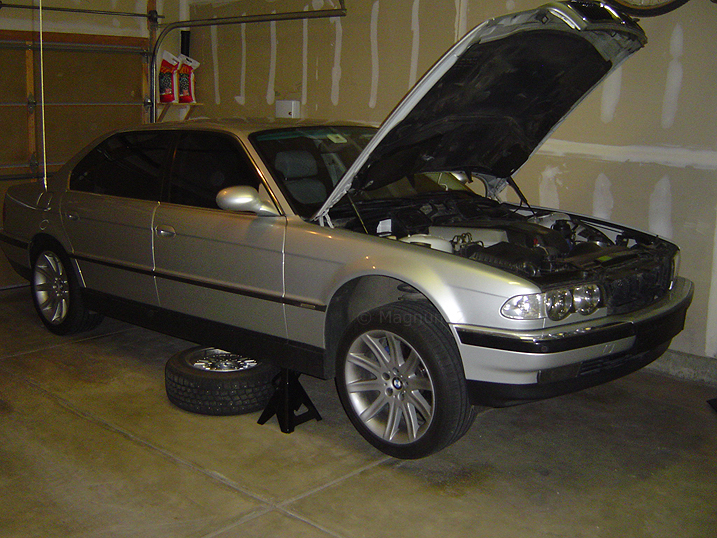
| Now
let’s work safely! I took the post out of my jack stands so the car
wouldn’t be up so high, if you’re using ramps you should be fine with
their height. I also threw my winter basket weaves under there as a
“just in case”. |
|
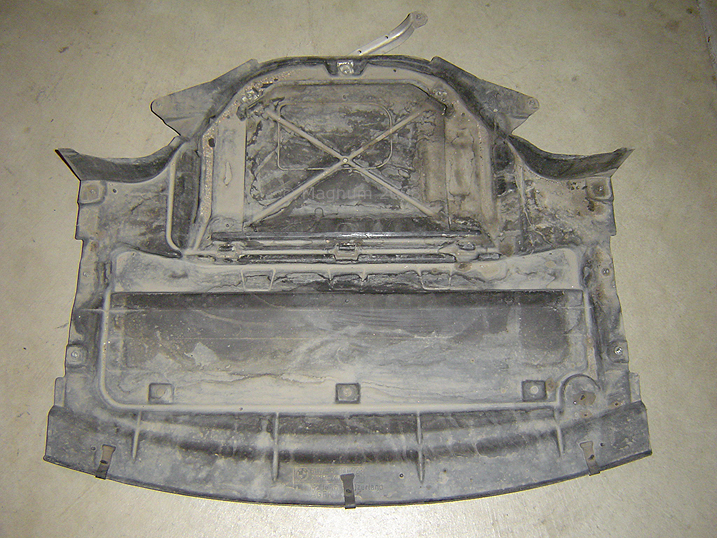
| Now crawl under the front and twist the Philips head screws securing
the belly pan, cover, shield or whatever “you” call it. |
|
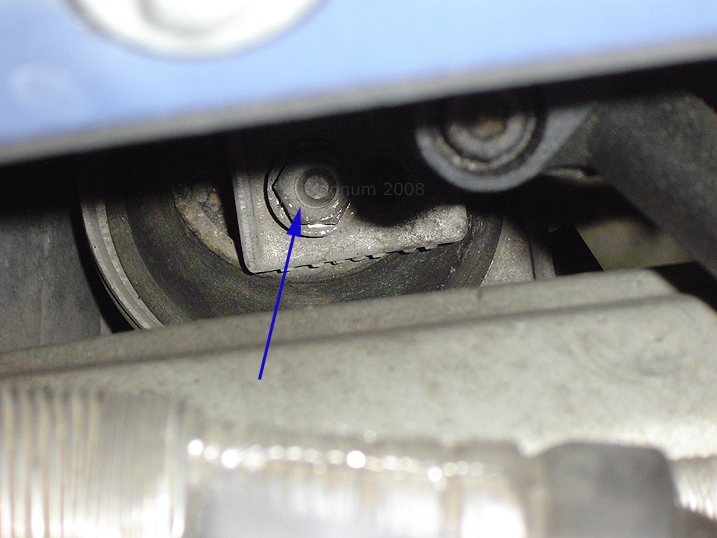
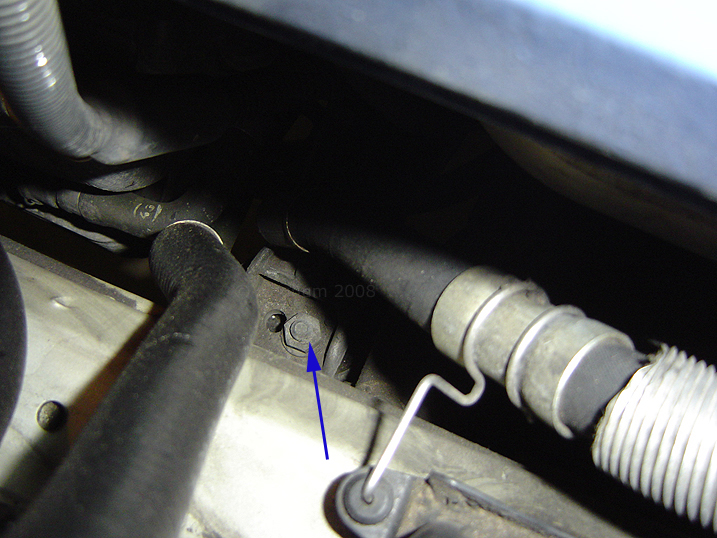
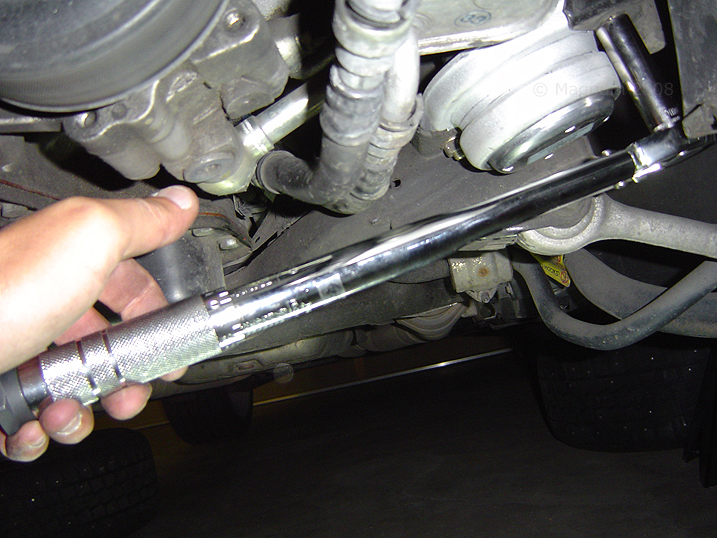
| Top view of Passenger [right] side motor mount, using a long extension
[20” or longer] and a 16mm socket to crack this bolt loose and remove
it: |
|
| Top
view of Driver [left] side motor mount, using a long extension [20” or
longer] and a 16mm socket to crack this bolt loose and remove it: |
|
| Now, [I say] loosen the clips and the small tube from the air box. I
say this because you are going to be jacking up the mount and this
will put strain on the MAF and hose: |
|
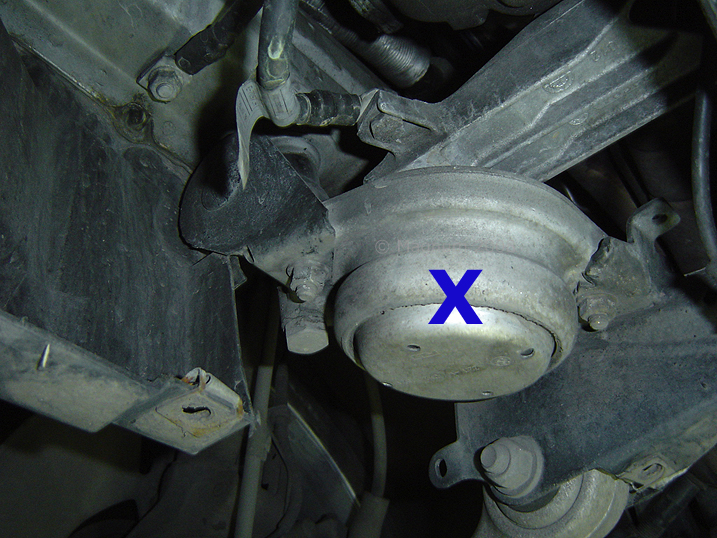
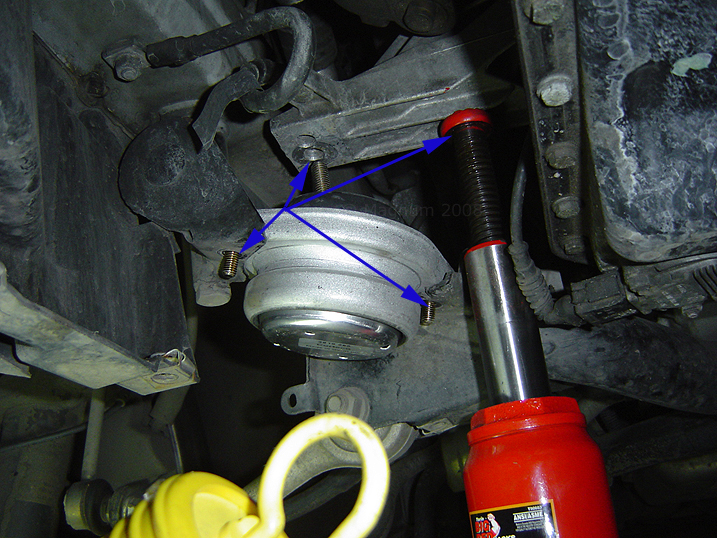
| Now
get underneath the car and locate the mount and bottom bolts on the
mount: |
|
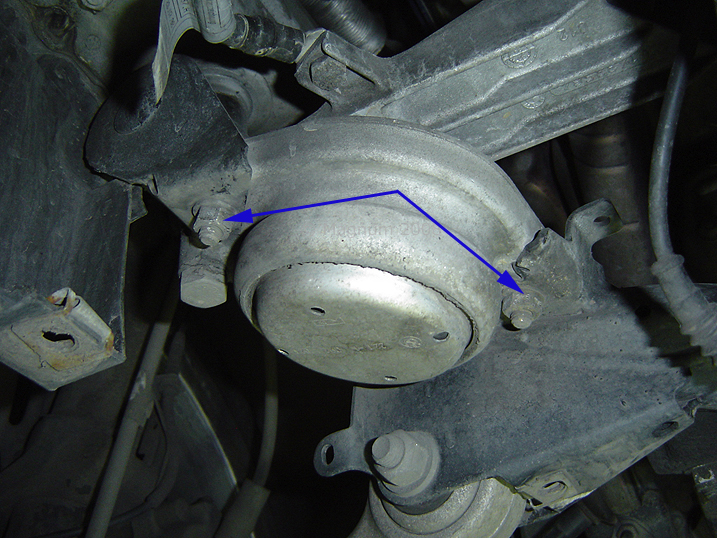
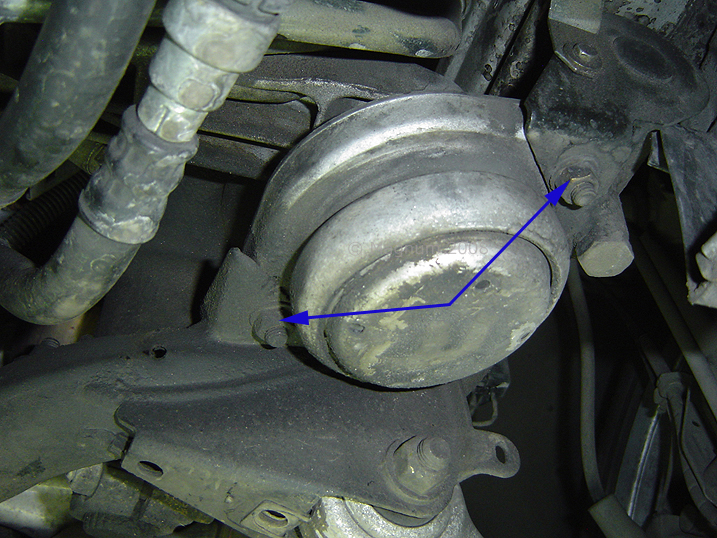
| Remove the 2 13mm bolts: |
|
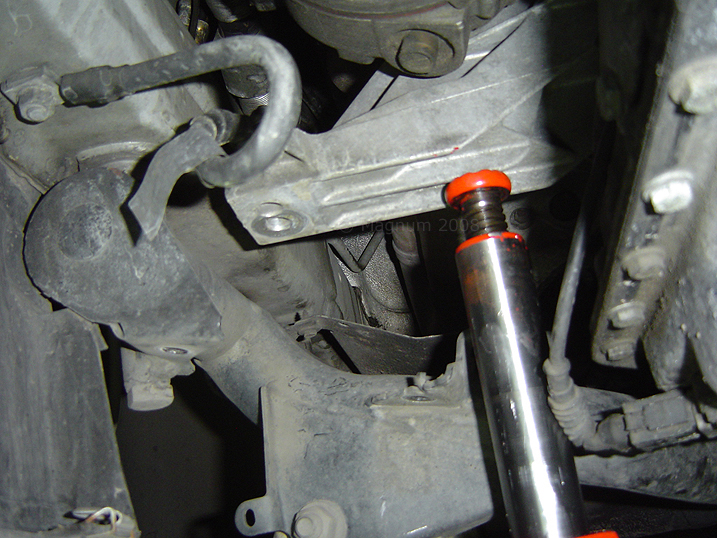
| Once the bolts are removed, put your bottle jack under the bracket and
jack it up. I used 2 - 2x6’s and a 4x6 stacked to get enough height
for the bottle jack to lift the 2 or so inches you need to lift it.
Once the top motor mount bolt is free, push up and start working the
mount out. Old motor mount is out: |
|
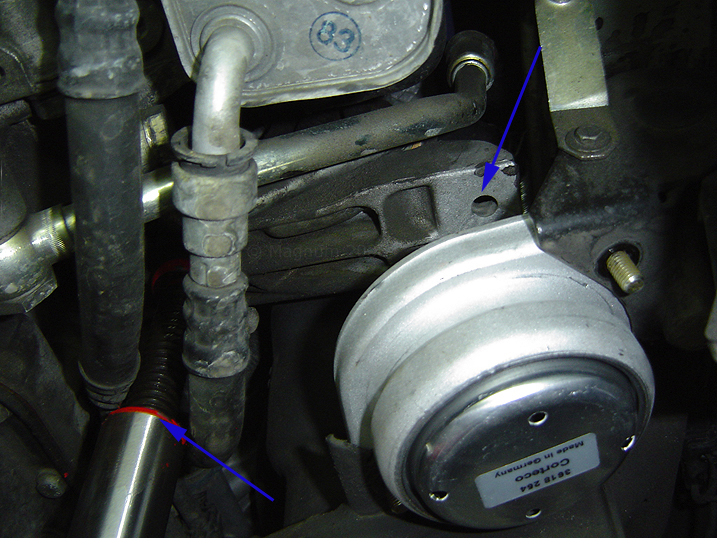
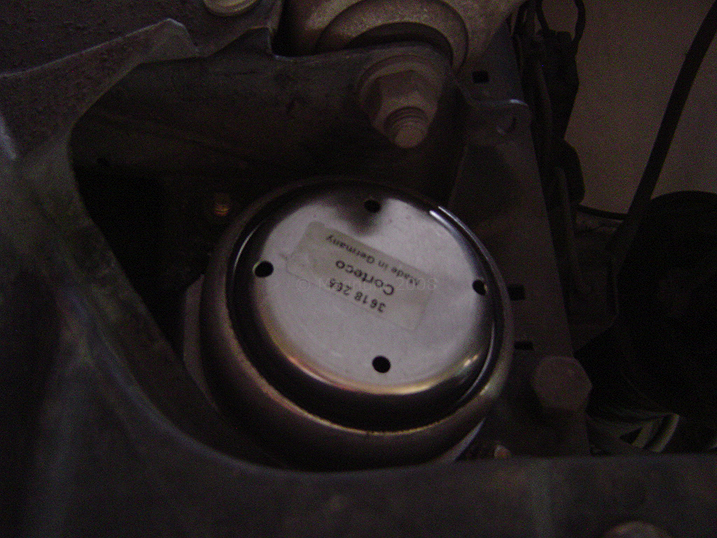
| Now
get the new mount in properly and then prepare to lower the engine
back down. Make sure that the motor mount bolt is positioned at the
same hole on the bracket it came out of and lower the engine down,
SLOWLY: |
|
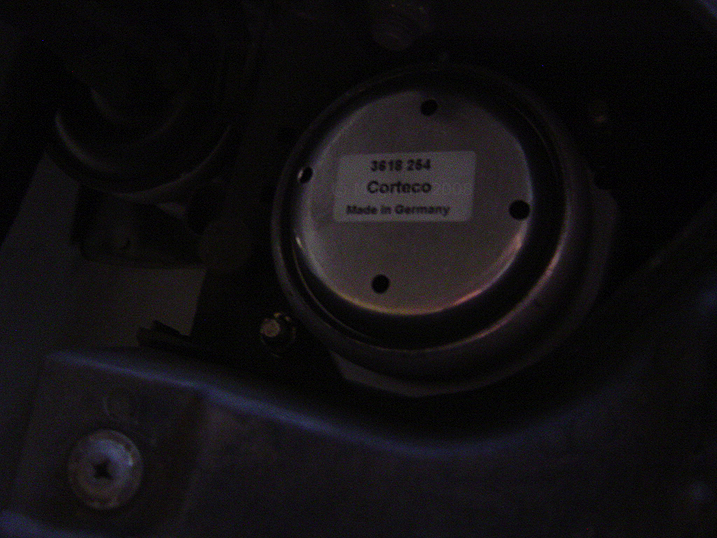
| Now it should look like this, then put only the lower nuts back on and
do not tighten yet. |
|
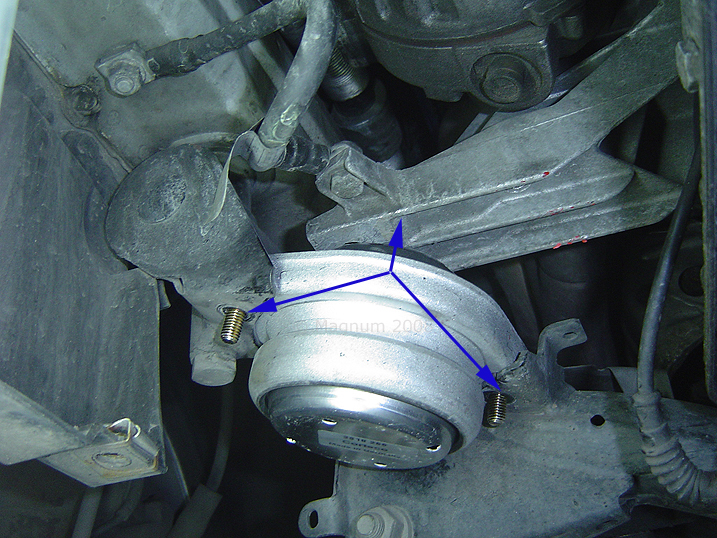
| Now let’s move to the driver [left] side. Same thing, remove the 2
lower 13mm bolts: |
|
| Then get ready to jack up the engine. I used the same 2 – 2x6’s and a
4x6 stacked to get enough height for the bottle jack to lift the 2 or
so inches you need to lift it. I found it best to thread these hoses
with the tip of the bottle jack and jack it up like so, jack up the
engine and swap out the motor mounts. Here’s the new mount already
in, now SLOWLY lower the engine making sure the top mount bolt is
positioned at the same hole on the bracket it came out of and lower
the engine down SLOWLY: |
|
| Now I went around to the 4 lower mounts bolts and torque’d them to 16
ft. lbs each, put the lower cover back on, then I took the car off the
stands and torque’d the 2 top nuts to 30 ft. lbs. each. I lowered the
car before doing the top for levelness on the engine / motor mounts: |
|
| Cover on and here’s the bottom of mounts: |
|
| Next: |
|
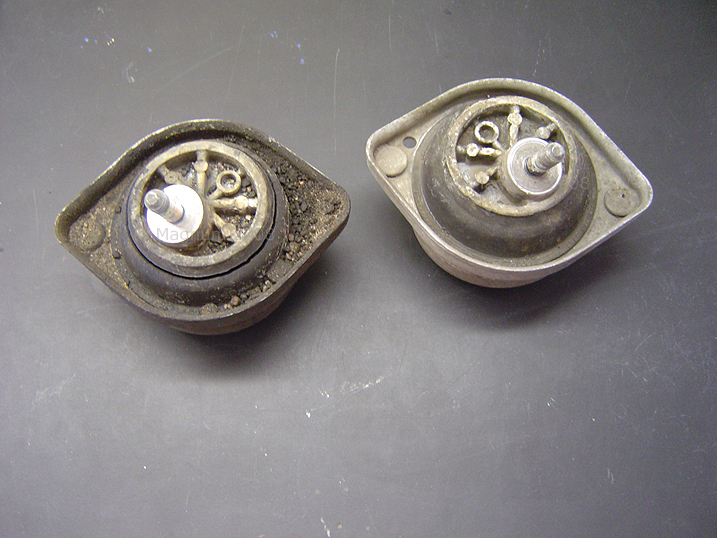
| Here’s both of my old ones side by side: |
|
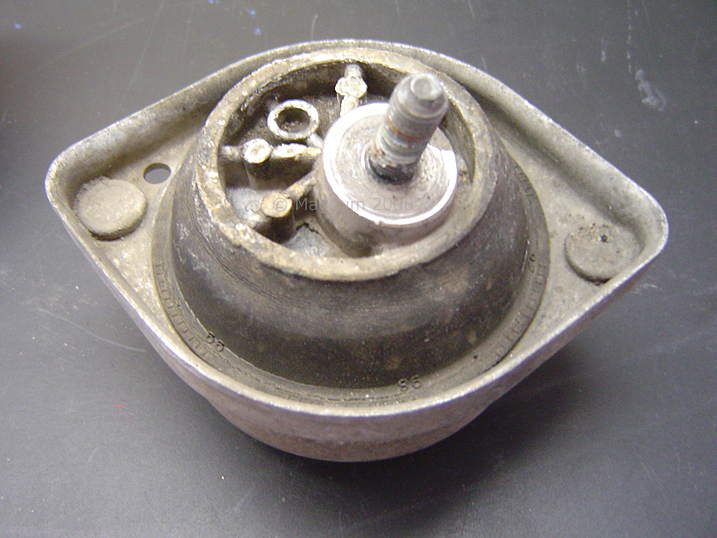
| Driver side close up, hmmm, no wonder I had a slight pulsation at my
foot and I could somewhat feel a shudder in the driver seat when
parked and idling. Pretty shot, but wasn’t fully busted open yet!: |
|
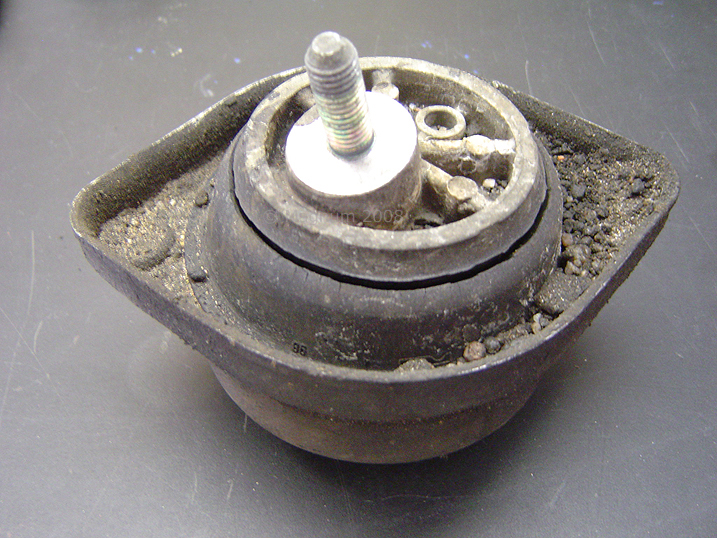
| Passenger side, doesn’t look to bad but you can see the same thing was
going to happen sometime by the slightly cracked ring: |
|